Mastering Printing on Linux: A Simple Guide to CUPS
A step-by-step walkthrough to make Linux printing seamless with CUPS.

If you've ever wondered how to make printing effortless on Linux, you're in the right place. In this article, I’ll walk you through how I used CUPS (Common Unix Printing System) to get my printers working smoothly on Linux. CUPS is a powerful open-source printing system that handles print jobs and queues, making sure your documents come out exactly as you expect.
What is CUPS?
Now, imagine you have a magic coloring book printer. You want it to print your favorite drawing. CUPS (which stands for Common Unix Printing System) is like the printer’s helper. You tell your drawing to CUPS, and CUPS tells the printer exactly what to do: which page, what colors, and how to print it neatly. Without CUPS, the printer could get very confused and not print what you want.
Tutorial
For this tutorial we’ll using an Ubuntu Distribution of Linux to install a Network Printer.
To add a network printer, open “Settings” and look for “Printers”, or search “printers” in Activities.
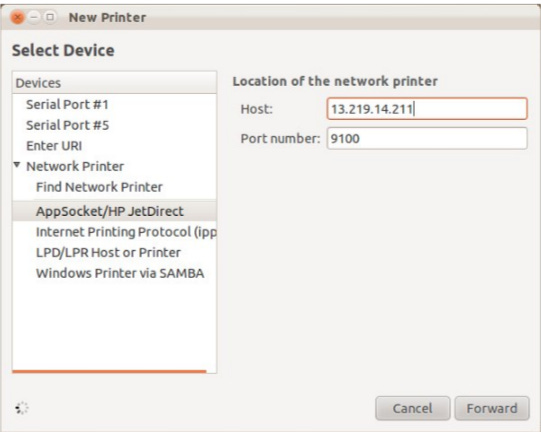
Add a new printer and select your preferred network connection (LPR, APPSOCKET, SAMBA via server…), and type in the connection details.
Alternatively, you can let Ubuntu find a shared printer automatically.
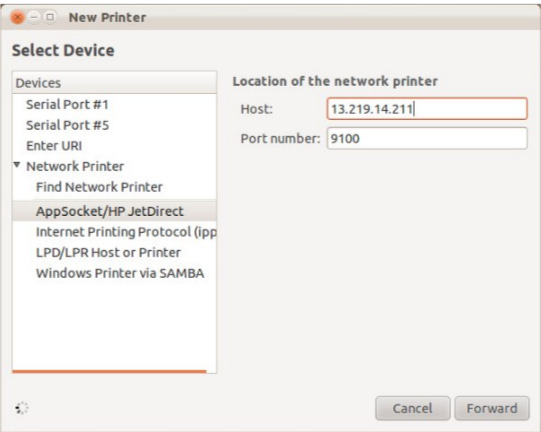
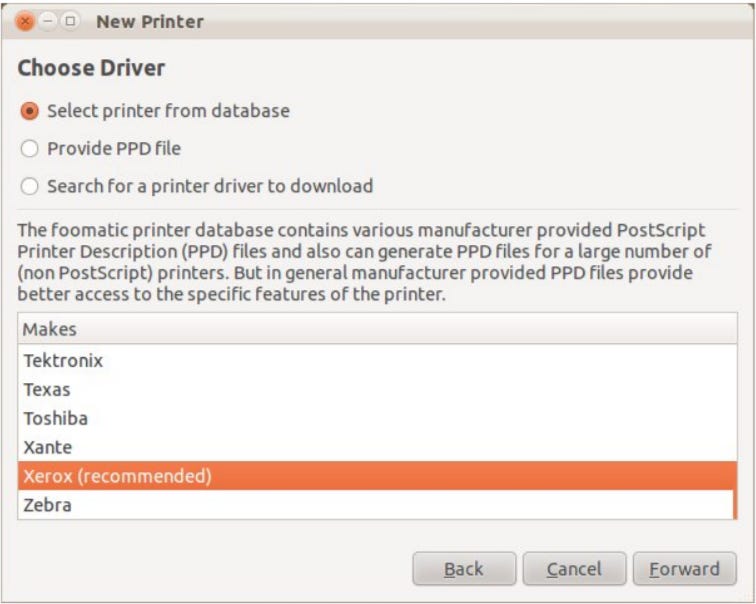
To choose your model from a list of manufacturers and available drivers, click on “Select printer from database”. Note that the majority, if not all drivers available in the database, are provided by the Linux community.
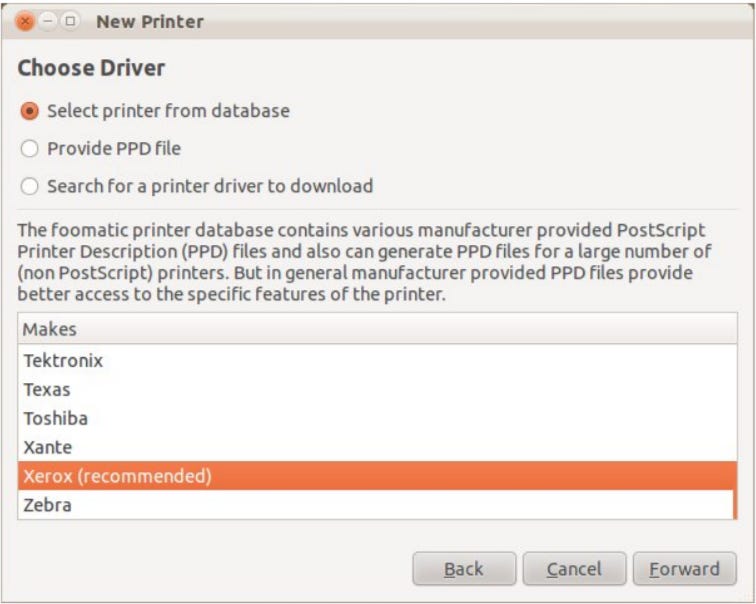
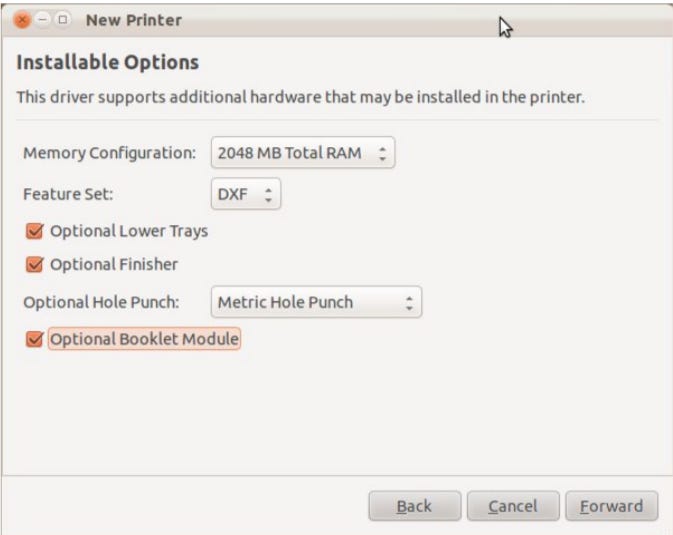
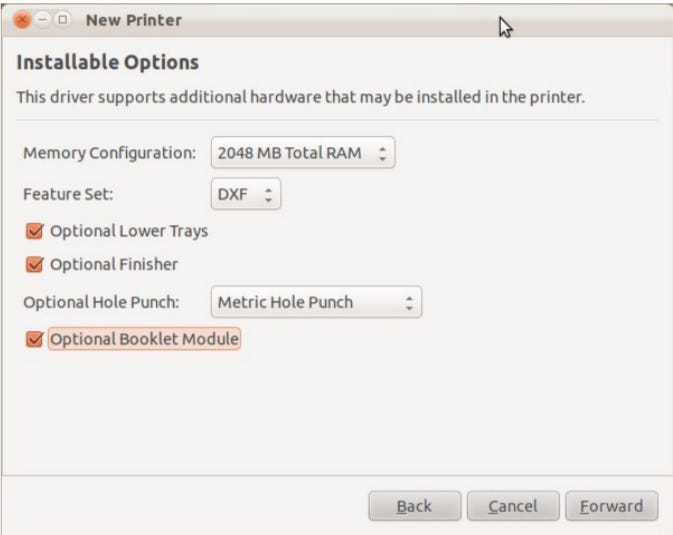
If the driver is compatible, configure the installable options, name your device, and you are ready to go.
Default printing options can be configured from the Printer menu at any given time, right-clicking on your printer and selecting Properties.
CUPS stands for Common UNIX Print System, and is the engine behind all printing management in UNIX-based systems. Any application used to install or manage printers in Ubuntu is going to be talking to CUPS in the background.
The CUPS service has a web interface that can be managed from any web browser: http://localhost:631
You can use CUPS directly to install, remove and otherwise manage your printers. It is very useful to discover problems with the printer queue that may otherwise not show in installations, and to setup advanced default settings.
To manage or add printers, click on the ADMINISTRATION tab:
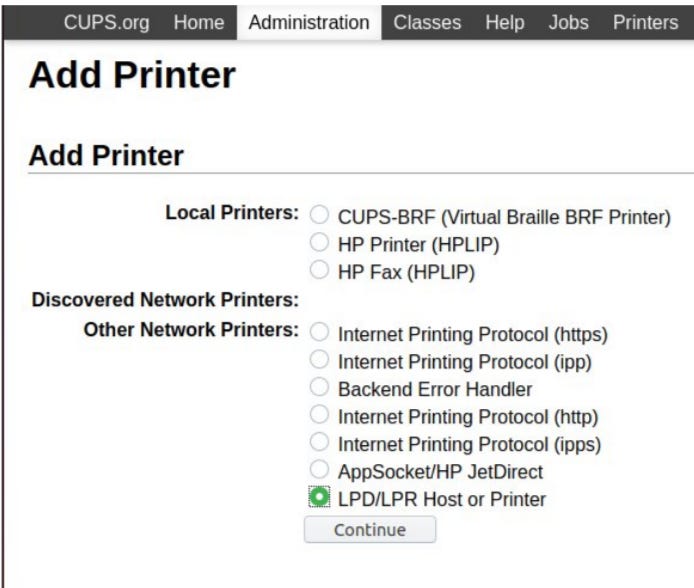
To add a printer, click on the Add Printer button:
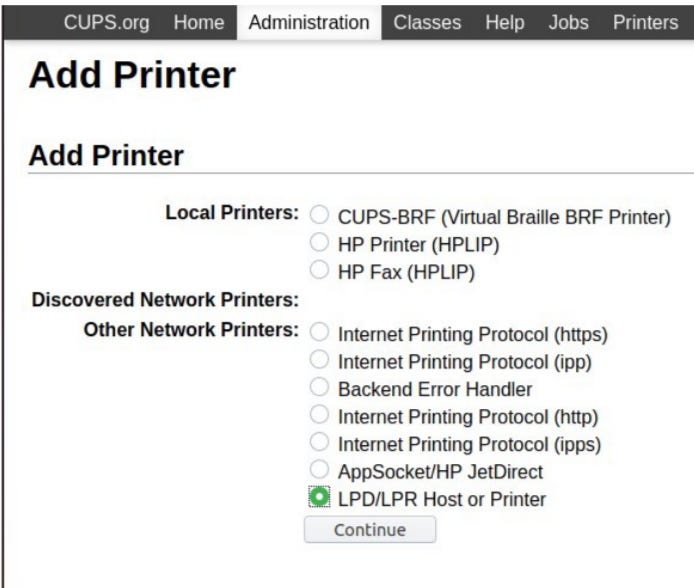
Using the grammar rules provided by CUPS, type the address of the printer, or print server. In the example, we are connecting to a printer directly using standard TCP/IP on port 515 (LPD; Line Print Daemon).
Type in a name and some information to identify your printer.
Note that CUPS will not allow you to use spaces in the printer’s name, so you may need to use underscores ( _ ) instead.
Select your printer driver from the list of available manufacturers or provide your own PPD (PostScript Printer Description). Note that the drivers provided in the manufacturers’ list are not official. The great majority of PPDs are either generic or custom-made by the Linux community.
Finally, fine-tune your printer options and accept the changes when you are finished. The printer will appear in a list, along all other installed models.
From there you can manage other options, like printing test pages, deleting or modifying the printer queue, etc.
CUPS allows you to check what each printer queue is processing or sending, the status of the printer, and whether there are any problems with the ports. If jobs are not being printed, and the standard Printing tool provides no information, check in CUPS for extra details.
You have now set up CUPS on a Linux Operating System.